Are you the type of person who likes everything to be straight and neat? Maybe you love the feel of a crisply made bed, with everything tucked just so? Then you might be the type of person who would love hospital corners on their sheets.
Also sometimes called military corners, hospital corners are a style of folding sheets on your bed so the creases are neat and so it’s harder for the sheet to come untucked. This fold may seem tricky at first, but it’s fairly simple to get the hang of after a little practice.
To help you along to folding beautiful hospital corners, I have put together a step-by-step guide showing you exactly how it’s done.
How Do I Fold Hospital Corners?
Step 1: Put Your Fitted Sheet on the Mattress
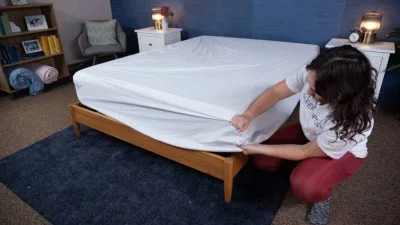
Put the fitted sheet on the bed as you normally would while making your bed.
Step 2: Lay the Flat Sheet on the Mattress

Lay the flat sheet on top of the fitted sheet, making sure the sheet hangs evenly on all sides. You will likely have to adjust the sheet a bit to make it even.
Step 3: Align the Top of the Sheet with the Head of the Bed
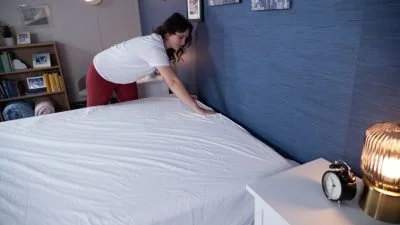
Once the sheet is hanging evenly on the sides and foot of the bed, align the top hem of the sheet with the head of the mattress.
Step 4: Tuck the End of the Sheet Under the Mattress
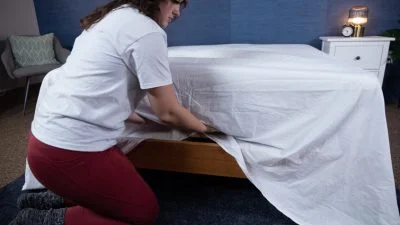
Pull the sheet taut to get rid of any wrinkles and tuck the end of the sheet underneath the mattress. You will have to lift the end of the mattress and push the sheet underneath. Be careful as you set the mattress back down not to scrunch or bunch the sheet up.
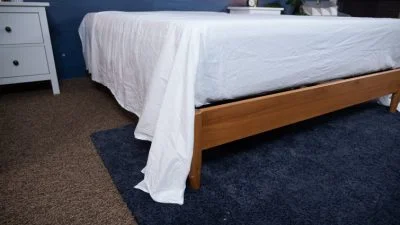
Once tucked, the sheet should look like this, with the middle tucked under the bed and the ends hanging off the sides. You may need to lightly pull on the outer ends of the sheet still hanging down the sides to keep everything taut.
Step 5: Lay the End of the Sheet Across the Top of the Mattress
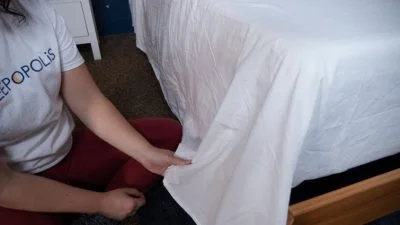
Grab the end of the section hanging off the side of the mattress a few inches in from the edge.
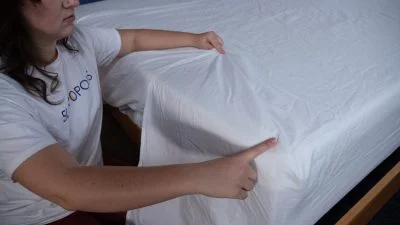
Pull that section on top of the mattress so that it creates a triangular shape with a 45 degree angle.
Step 6: Tuck the Leftover Sheet Underneath the Mattress
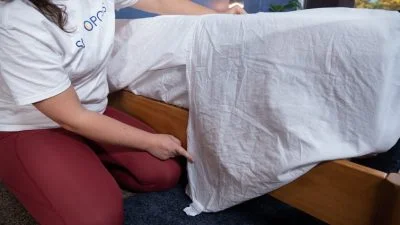
After you make the 45 degree angle on top of the mattress, there should be some sheet left hanging down.
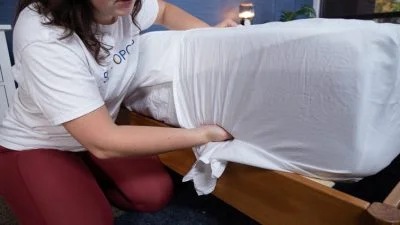
Tuck this remaining section underneath the mattress while holding your triangle section in place.
Step 7: Place Your Hand Along the Edge of the Mattress
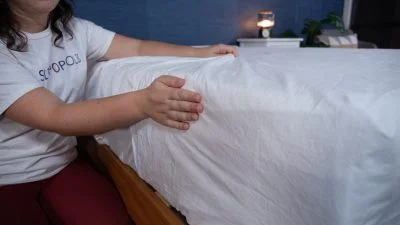
Once the sheet is tucked, straighten it out so that everything is taut. Then, place your hand along the edge of the mattress.
Step 8: Fold the Sheet Over Your Hand
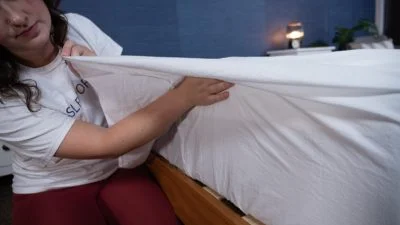
With your free hand, take the section of sheet on top of the mattress and fold it over your hand placed along the mattress. This should create a crease.
Step 9: Tuck the Sheet Underneath the Mattress
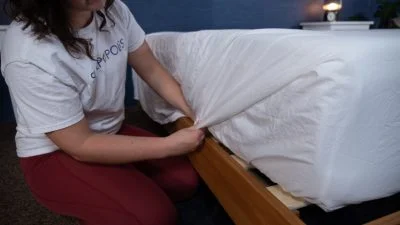
Once the crease has formed, tuck the end of the remaining sheet underneath the mattress. Be sure to keep the sheet as tight as possible as you tuck. You should see a visible crease formed from the two sections of flat sheet.
Step 10: Straighten Out, Finish Tucking, and Repeat on the Other Side
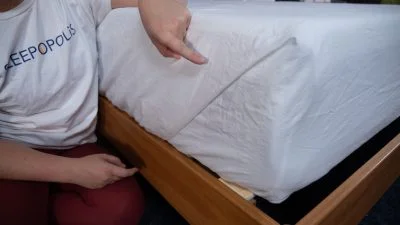
When the remaining sheet is tucked to form the crease, you may need to straighten it out in order to achieve a crisp line like this one — especially on your first few tries. Then, tuck in the rest of the sheet on that side (the flat sheet toward the head of the bed will still be untucked at this point) and repeat this process on the other side of the bed.
Final Thoughts
This process will likely take a few tries to master, so don’t get frustrated or discouraged if you don’t get it right on the first try. As you practice, you will better understand how the fold is created and might even come up with your own methods and tricks to achieve it perfectly the way you want it.
Additionally, I suggest using a structured, crisper sheet to fold hospital corners, such as a cotton percale sheet. That will make it easier to achieve the clean lines and sharp folds than if you use silkier, slipperier sheets.
If you are on the hunt for a new set of sheets, be sure to check out our roundup of the best sheets.
Hopefully after reading this guide, you are on your way to folding hospital corners of your own!


