


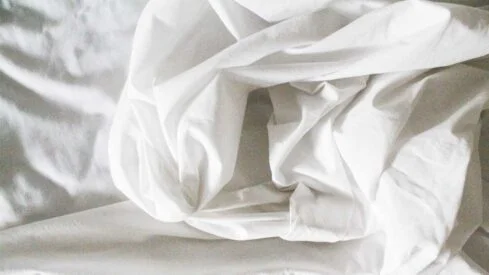


Folding a fitted sheet is a skill that truly makes you feel like you have your life together. Yes, you could just roughly “fold” your fitted sheet into a jumbled pile, but there’s something truly satisfying about folding it flat. Not to mention, a clean fold will reduce wrinkles in your sheets and make storage simpler.
However, folding a fitted sheet is not an intuitively simple task. That’s why in this article I’ll teach you how to fold a fitted sheet (two ways!) like a pro.
How Do I Fold a Fitted Sheet?
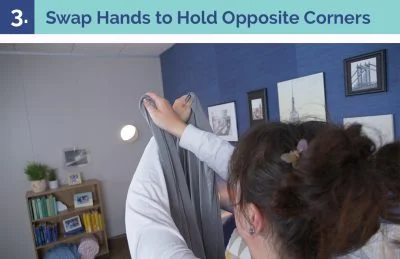
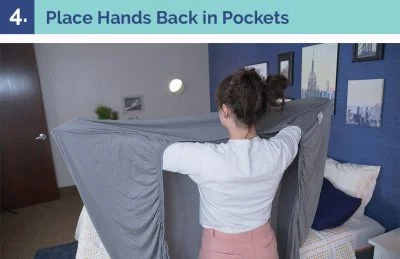
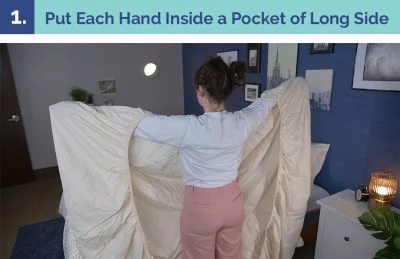
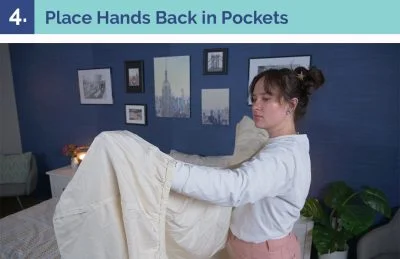
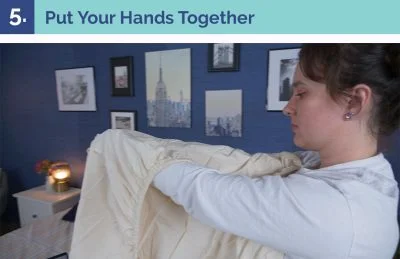
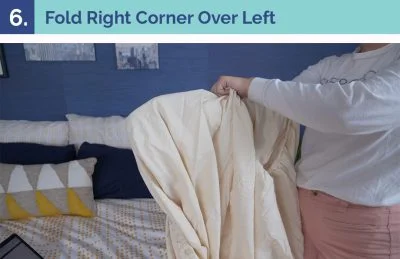
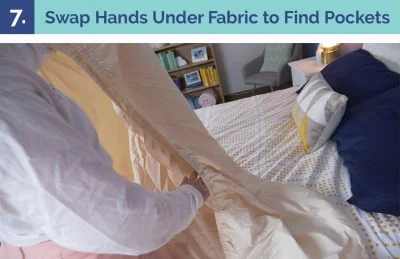
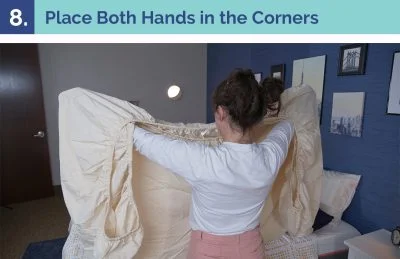
Let’s get into the nitty-gritty of fitted sheet-folding. Keep in mind that some materials are easier to fold than others. For example, the sheet I used in Method One is made from slinky viscose — which was more difficult to fold — whereas in Method Two I used a sturdier cotton sheet.
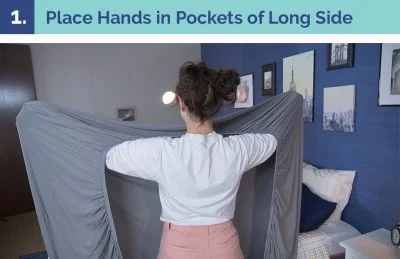
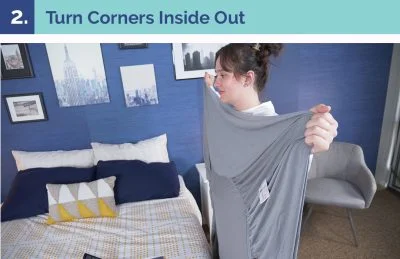
Method One
@sleepopolis learn our first method of folding a fitted sheet! did you already know how to do this? ? #sleeptok #sleepbetter #howtofoldafittedsheet #fittedsheetfolding ♬ original sound – Sleepopolis

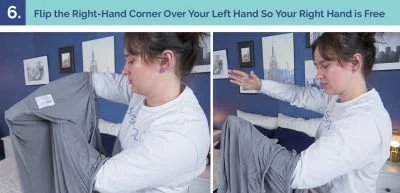
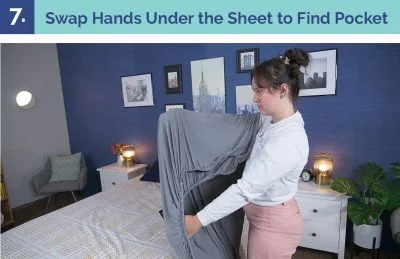


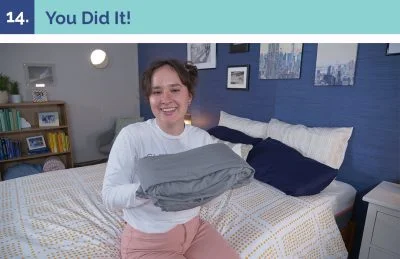
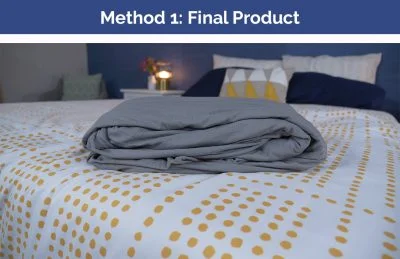
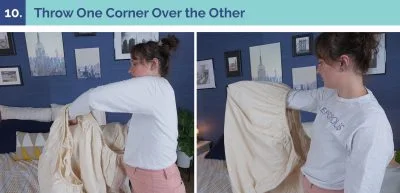
You did it! Congratulations on learning our first method of folding a fitted sheet. Now, let’s move on to Method Two. This method produces a more compact finished product, so it may be of interest to those trying to save space.
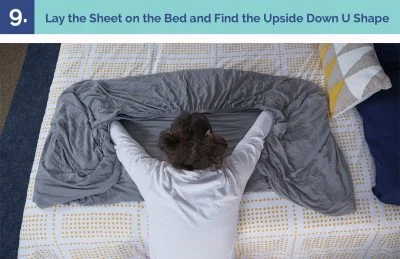
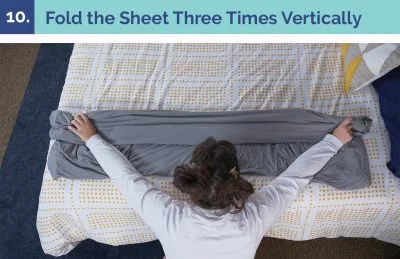
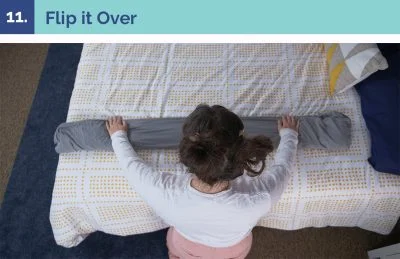
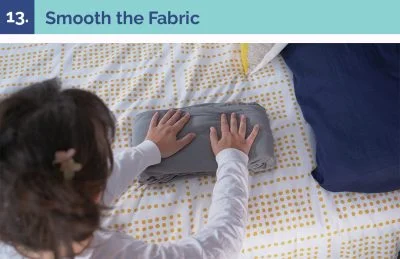
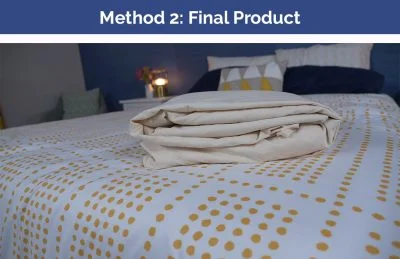
Method Two
@sleepopolis our second method to fold a fitted sheet! which do you prefer, method one or two? #sleeptok #sleepbetter #howtofoldafittedsheet #fittedsheetfolding ♬ original sound – Sleepopolis


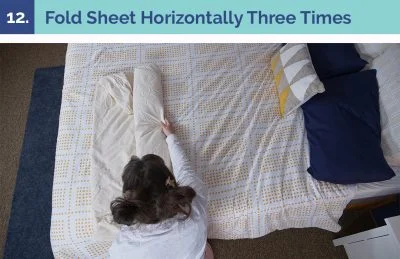
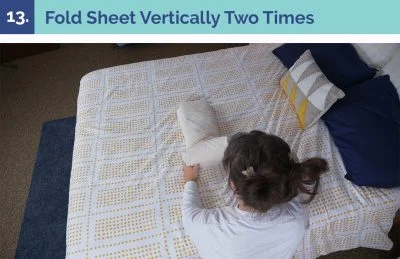

You did it! Personally, I prefer Method Two over Method One, but I recommend trying both to see which is easier for you. Plus, once you master one method, the other should come to you easily.
Final Thoughts
If you’ve made it to the end of this article, hopefully you are feeling like a master of folding a fitted sheet. It’s a great skill that can help you save space, prevent your sheets from wrinkling, and make you feel a little more put together.
Sheets are an important part of your bedroom setup, so be sure you’ve got the best ones. If you’re looking for a sheet upgrade, check out our best sheets roundup to find a set that will work for you — and now you’ll be able to fold them.